Gutenberg blocks can take your WordPress website or WooCommerce store’s design to the next level. However, sometimes you may need to hide unwanted Gutenberg blocks on your WordPress site. If so, this article is for you. In this article, we will show you how to hide unwanted Gutenberg blocks in three ways.
But before going into that, let’s see the Gutenberg editor in detail.
What Is the Gutenberg Block Editor
Gutenberg block editor is the all-new, updated editor for WordPress. In 2018, the WordPress development team came up with the idea – of a visual builder to develop content and robust websites. That’s how the Gutenberg block editor came to the market.
In comparison, the old TinyMCE-based Classic Editor looks like this:
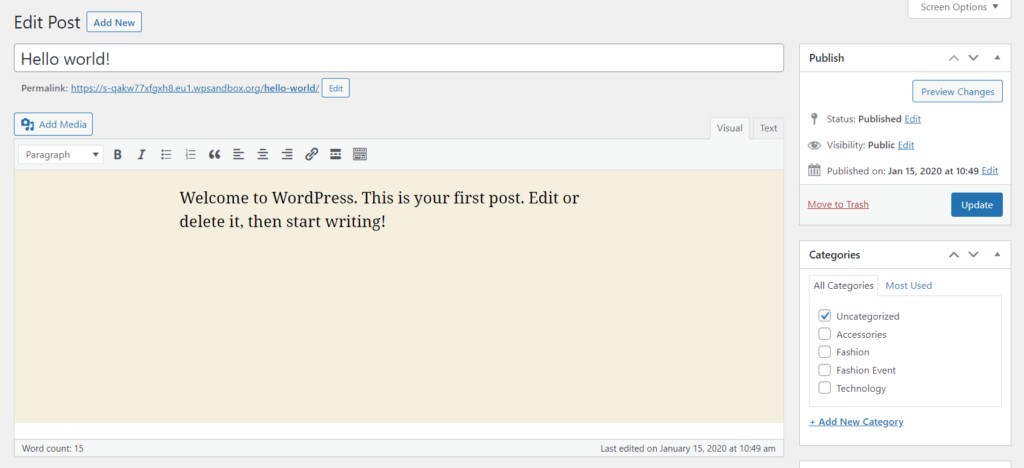
As you can see in the image, the design is very basic and outdated. Plus, if you are building a custom homepage or landing page, you won’t be able to do it quickly.
On top of that, you need to check the front end of the website to ensure all the updates are playing nicely and everything is going as expected.
As a beginner or creative person, checking the front end every time won’t be a feasible option. And that’s where the Gutenberg editor can be helpful. The new Gutenberg block editor’s interface looks like this:
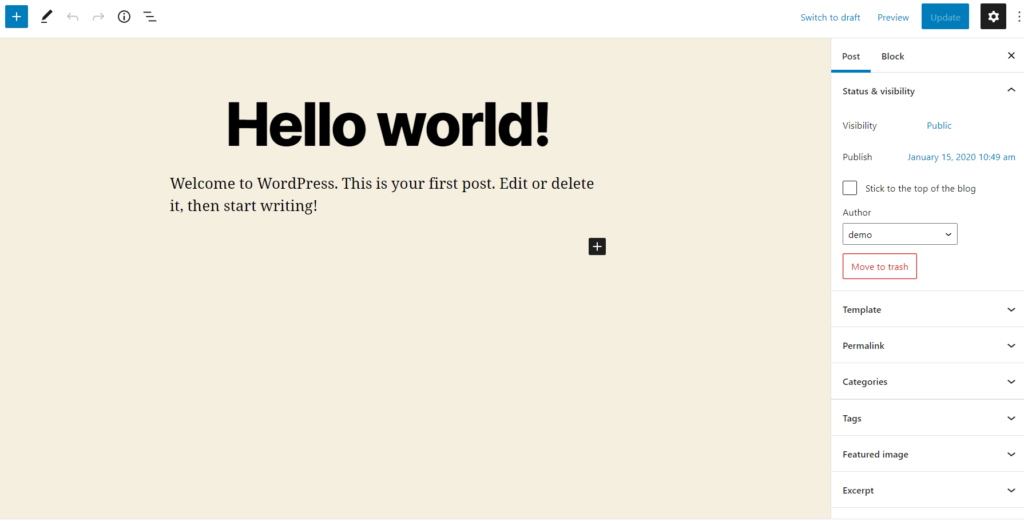
As you can see above, the interface is spotless, and designing a custom homepage/landing page might be a cakewalk. Plus, you can use the dedicated blocks to build any website however you like.
All in all, Gutenberg is the advanced visual editor you need to try.
However, if you still prefer Classic Editor over Gutenberg editor, you can always disable Gutenberg and bring back the Classic Editor.
Moving on, in the next section, we will cover Gutenberg blocks and see how we can use them to build modern websites.
What Are Gutenberg Blocks
Gutenberg Blocks are interactive elements you can use inside the Gutenberg editor. They are the building blocks of a modern site.
When you write a blog post or develop a custom landing/homepage, you need to use dedicated blocks that suit the case. There are a lot of blocks available for WordPress. Some of the widely used and popular ones are:
- Paragraph
- Heading
- List
- Image
- Code
- Table
- Calendar
- Custom HTML
- Latest posts
etc.
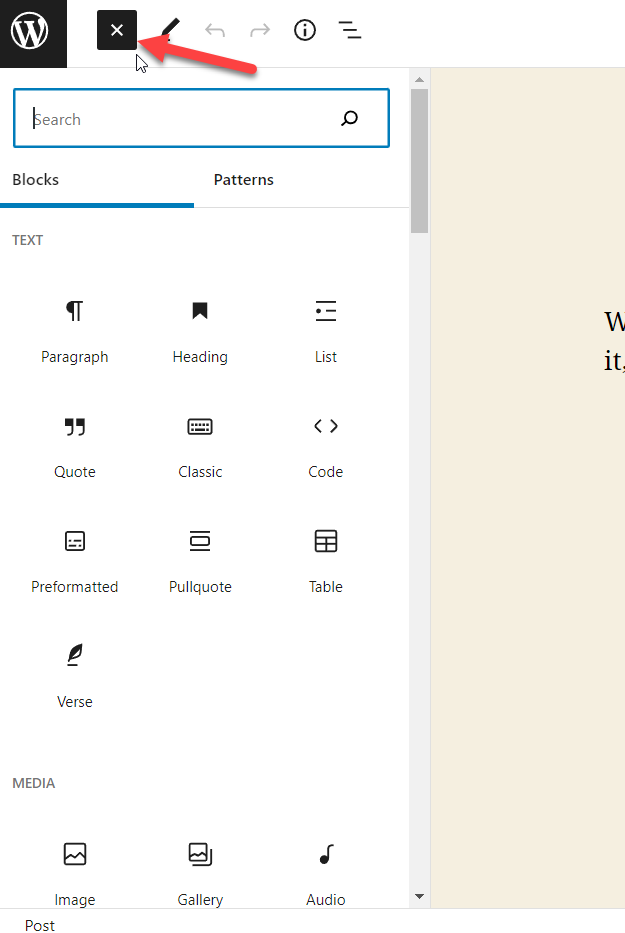
You can see all the available blocks and insert them into the editor by clicking on the + button inside the Gutenberg editor.
Apart from the default Gutenberg blocks, you have many Gutenberg blocks plugins to extend the functionality of the Gutenberg editor. For example, the popular WordPress form builder plugin WPForms will add a Gutenberg block that can help the website admin choose a created form without pasting any shortcode.
Similarly, most WordPress themes and plugins will add custom blocks to make our and their life easier.
You can add the blocks to the editor by typing / followed by the name of your desired block. For example, if you need to add a button block inside the editor, use a command like /button.
Alternatively, you can also use the + sign on the top left-hand side of the page. Both will work fine.
By now, we got the idea of Gutenberg blocks and their usefulness. Now you may ask, why would we need to disable a block? So, let’s get that clear.
Why Hide Gutenberg Blocks?
You may want to hide Gutenberg blocks occasionally to keep everything minimalist, avoid confusion, etc.
When Gutenberg was released, most people found it a little challenging. That’s why the WordPress devs created the Classic Editor plugin. Eventually, people got used to Gutenberg editor, and it became one of the famous and easy-to-use solutions for content creation and WordPress designing. Right now, it is used by millions of people around the globe.
However, the editor comes with a lot of blocks. Most people will use only some of them. The others are sitting there for no reason. So, if you think you need to reduce the bloat in the website, you should try removing the blocks you do not need/use.
Apart from that, if you are working with multiple authors on your website, they might feel overwhelmed with all these blocks. Sometimes, they might struggle to find the right block from the list.
To help the authors, you can enable the main blocks you plan to use on the site. This way, the authors will have easy access to the blocks they need, and you can quickly expect an increase in productivity.
With that out of the way, let’s now move on to the actual stuff. Let’s see how we can hide unwanted Gutenberg blocks.
How to Hide Unwanted Gutenberg Blocks
This section will cover how you can hide unwanted Gutenberg blocks correctly. We have got three solutions for this task.
- Default method
- Plugin method
- Coding method
We will show you all three methods below. From there, you can choose your preferred method. So without any further ado, let’s get started.
1) Hide Gutenberg Blocks via the editor
This is the basic and most straightforward way if you need to disable Gutenberg blocks on your website. This method doesn’t require any third-party plugin or custom codes.
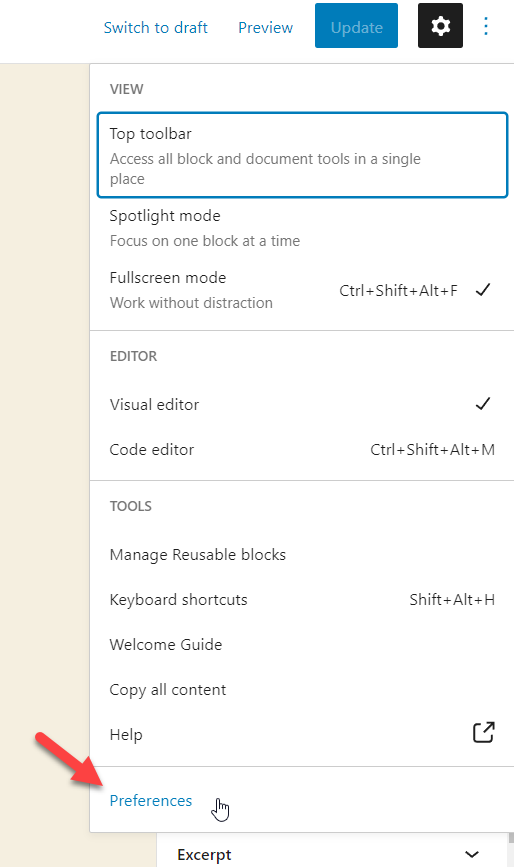
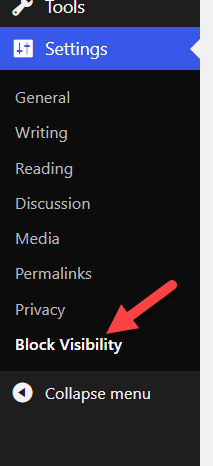
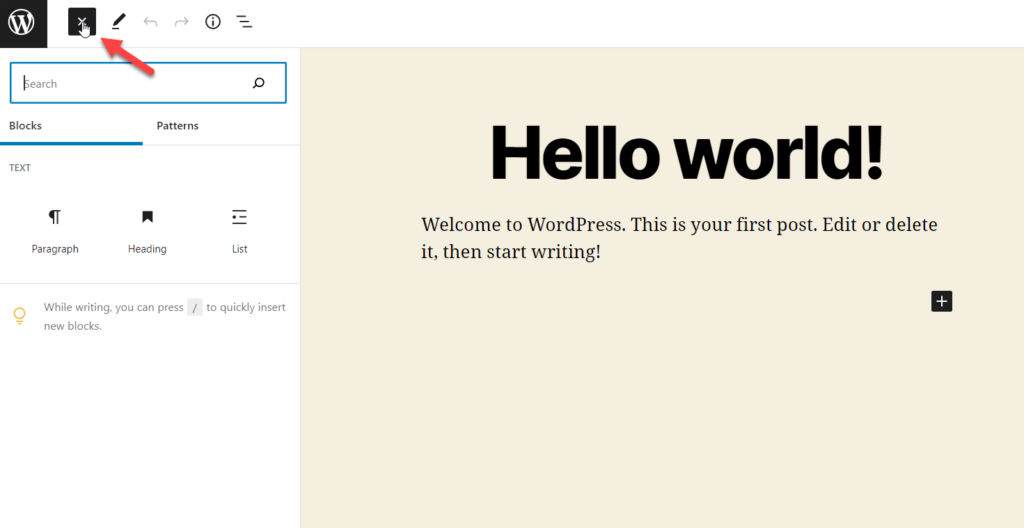
All you need to do is, open the Gutenberg editor on your website. You can open your posts, pages, or even custom post types. Once you have opened the Gutenberg editor, you need to click on the three dots on the top right-hand side of the page.
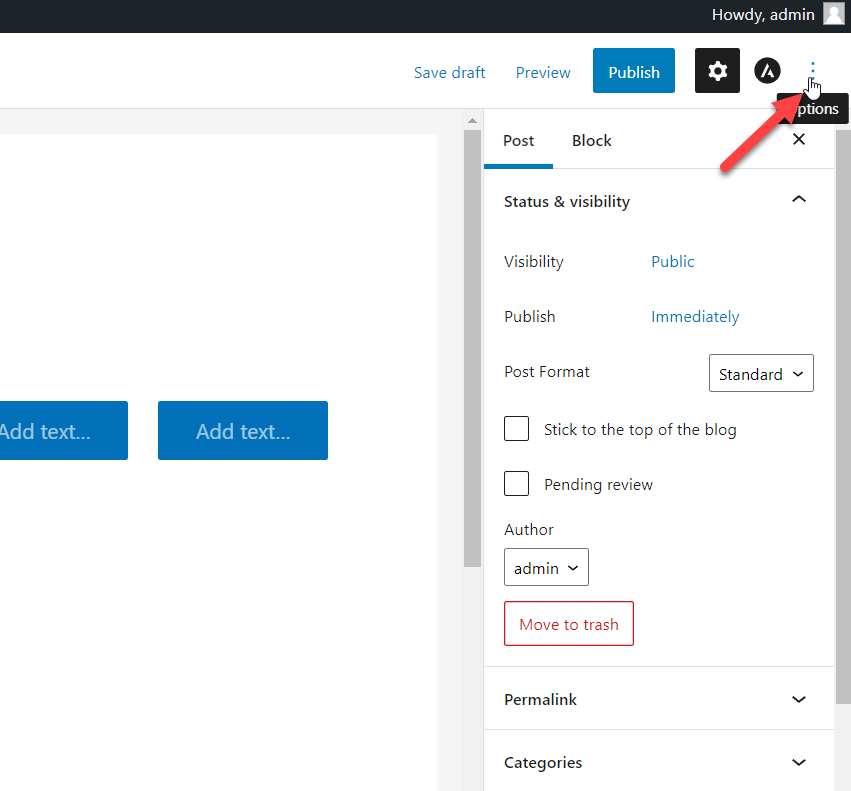
After that, choose the Preferences option.
On the next page, you will see the Gutenberg preferences.

Choose the Blocks option from there.
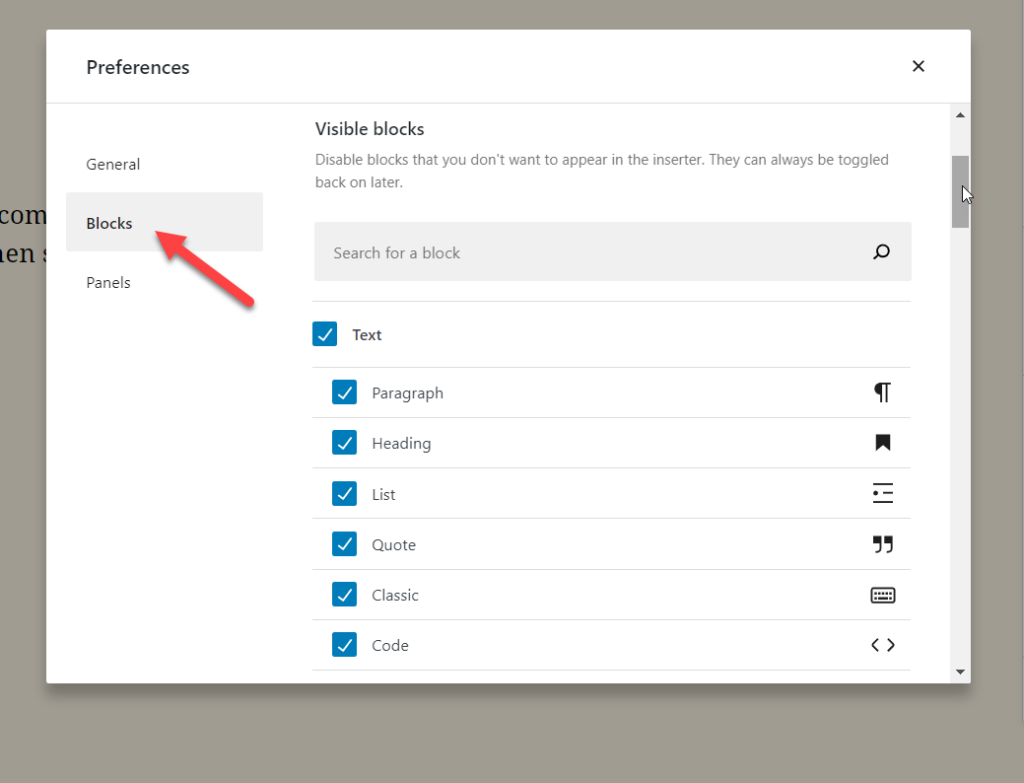
From here, you can enable/disable the blocks you need. The search feature available on this page is very convenient. You can use the search feature to hide/show blocks according to your preferences.
This way, without using any plugins, you can hide Gutenberg blocks.
2) Hide Gutenberg Blocks Using Block Visibility Plugin
Block Visibility is a free and easy-to-use tool if you prefer a WordPress plugin for hiding the Gutenberg blocks. This section will show you how to use the Block Visibility plugin to hide Gutenberg blocks on your WordPress website.
The very first thing you need to do is install and activate the plugin on your website.
2.1) Installation and Activation
You need to go to the Plugins section and then Add New plugins. From there, you can search for Block Visibility and install it.
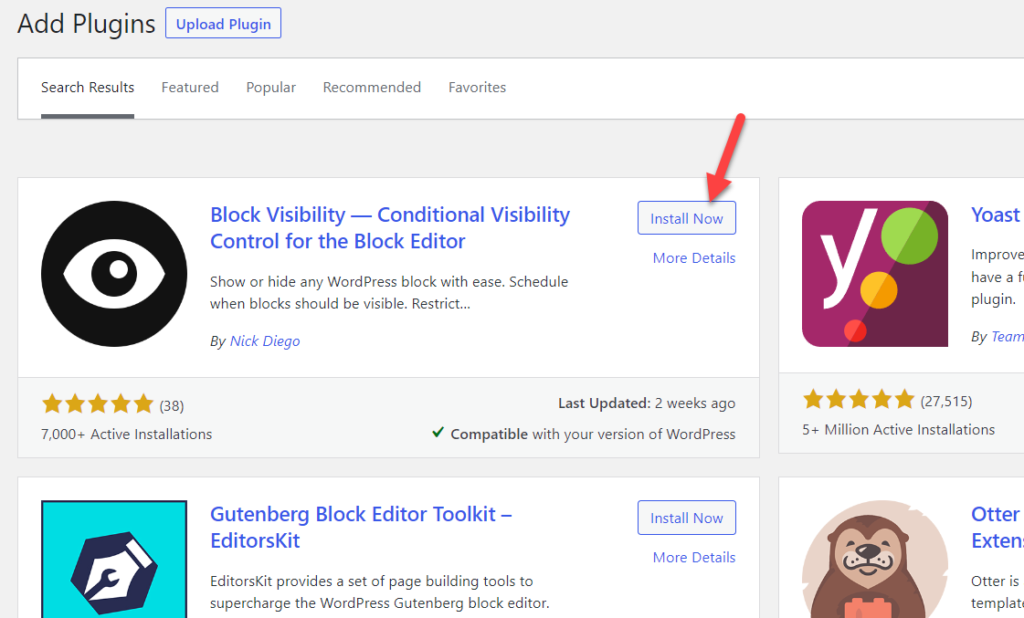
Once you have installed the plugin, activate it.
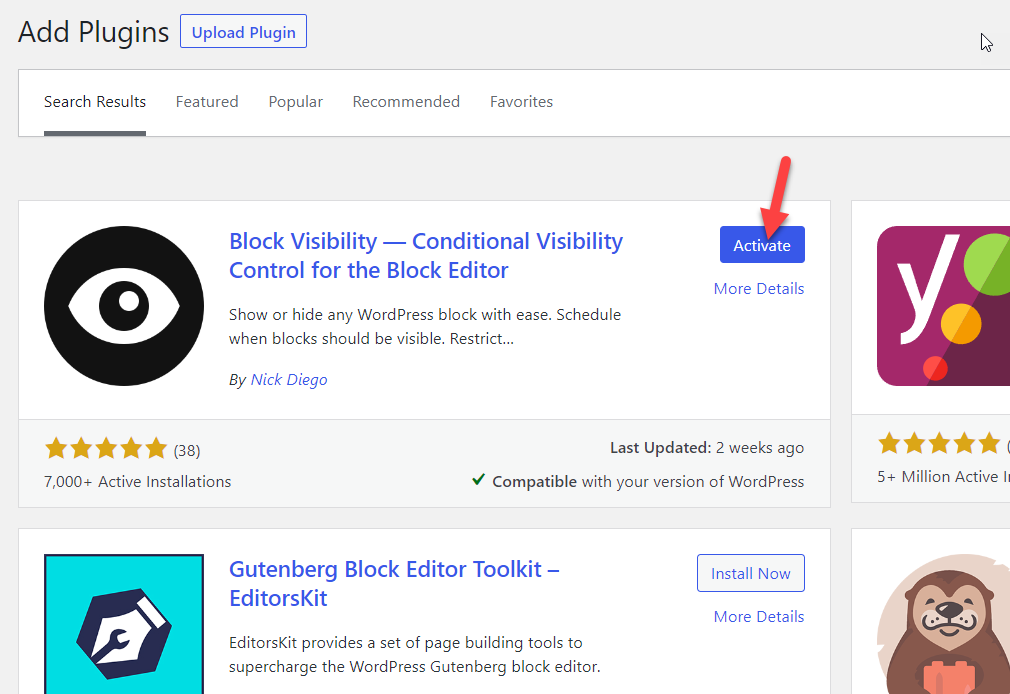
Now under the WordPress settings, you will see the plugin’s configuration options.
2.2) Plugin Settings
The plugin has three major customization options.
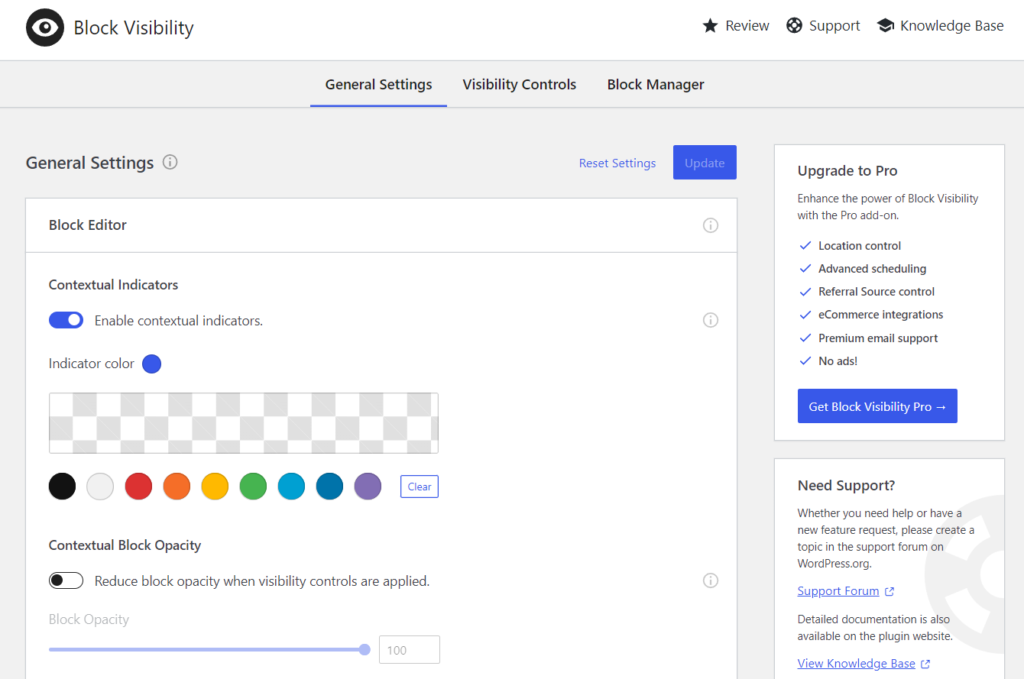
- General Settings
- Visibility Controls
- Block Manager
To enable/disable blocks on your website, go to the Block Manager section.
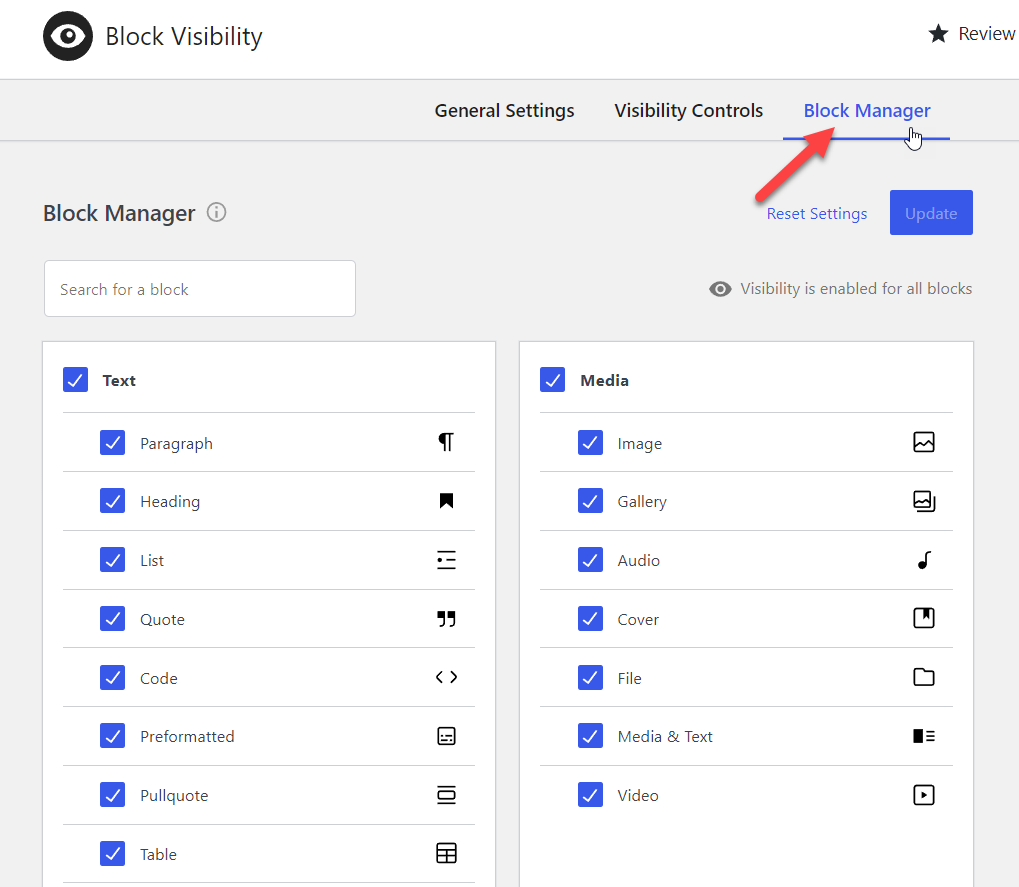
As you can see above, by default, all blocks are enabled. If you need to disable a block, you must uncheck it. For example, if we need to hide the table and verse blocks, we need to modify the settings like this:
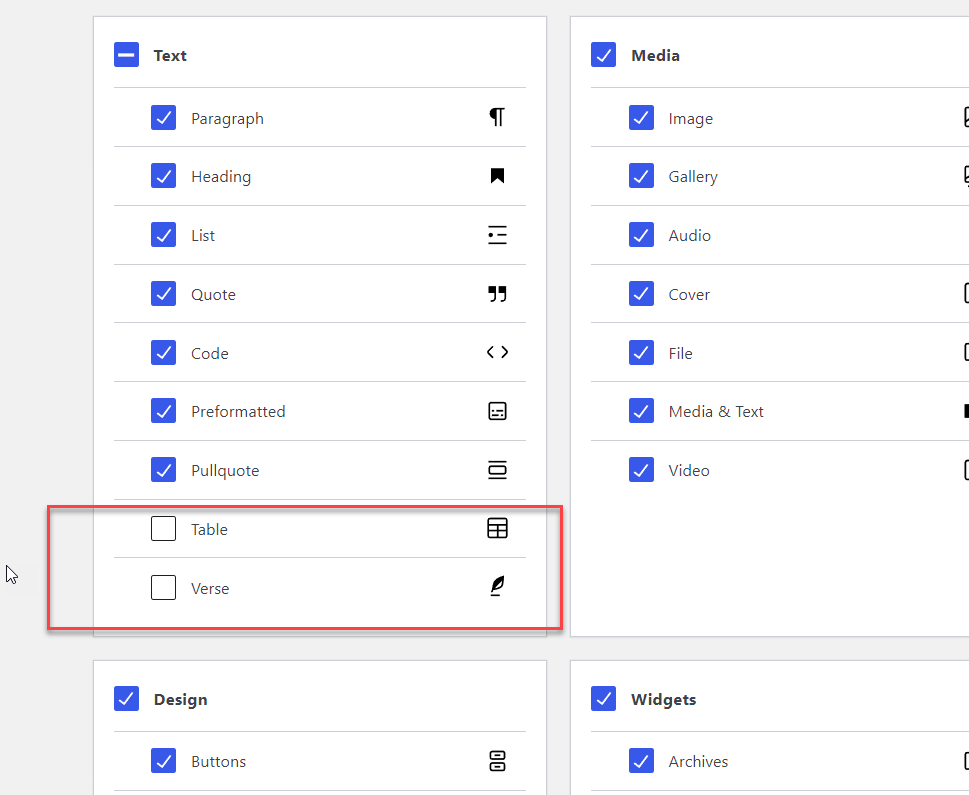
On the other hand, you can also disable an entire section by selecting the primary category. If you plan to disable the design-based blocks, uncheck the design option.
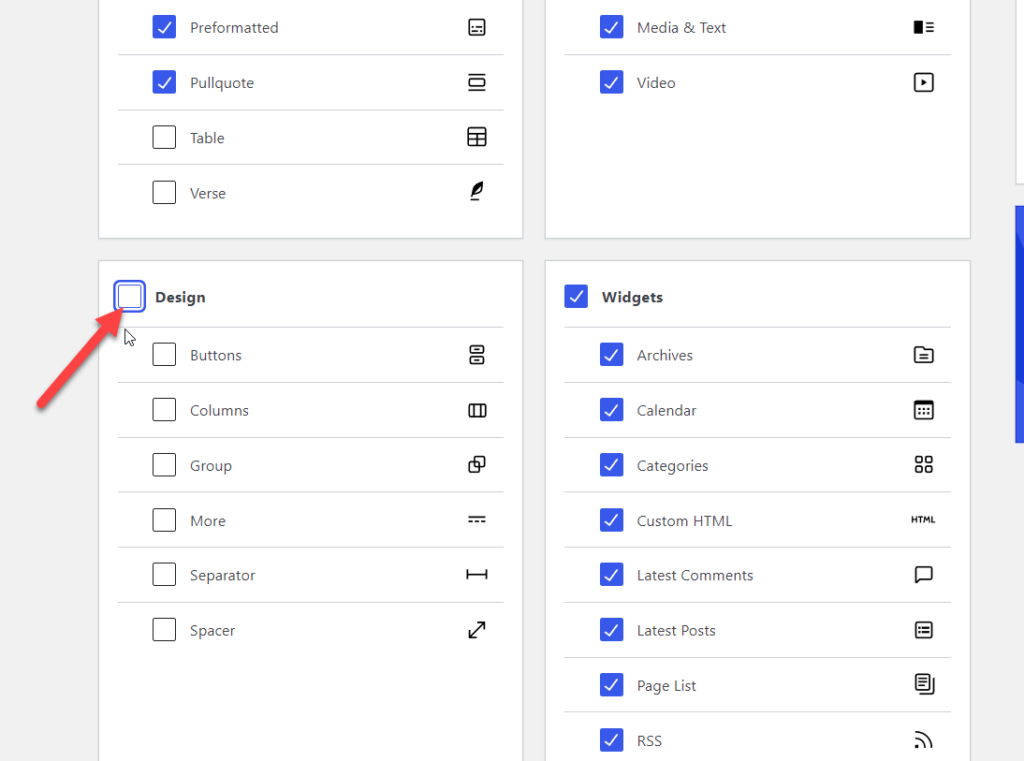
As you can see, unchecking the primary option will disable all the blocks inside it. This is a great way to disable multiple block controls at a time.
Once you are done with the options, update the settings.
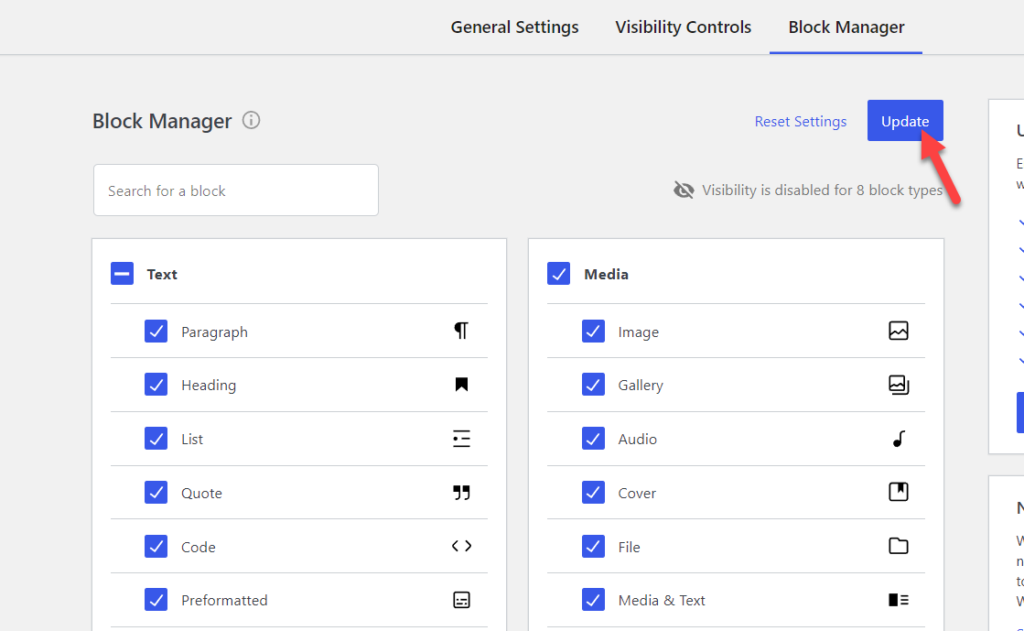
One of the main advantages of the plugin is it will show you all the changes in real time. In our case, we have disabled 8 Gutenberg blocks on our site, and if we need to enable all, we can click the Reset Settings button.
That’s it! This is how you can use a dedicated plugin like Block Visibility to hide the Gutenberg blocks.
3) Programmatically
Before moving to the code that will hide all the unwanted Gutenberg blocks from your WordPress website, you need to know which blocks you will remove and their exact names.
Thankfully, inside the WordPress developer resources, the devs created an article explaining more about the blocks and their names. This is a direct link that will lead you to the article.
If you check the page, they list all the available Gutenberg blocks and their names.
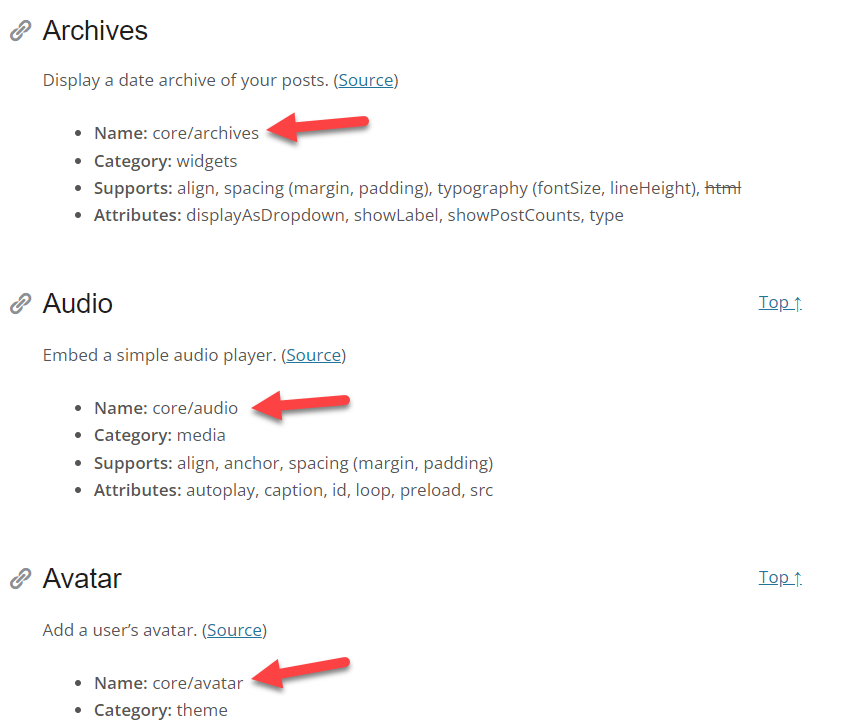
Note the block names you want to hide because we will need the block name inside the snippet.
Once you have noted the names of the blocks, we have multiple code snippets to allow/disallow blocks inside Gutenberg. We will list some of the different options here.
3.1) Allow Specific Gutenberg Blocks Only
This will be the right solution if your main goal is to allow only a set of Gutenberg blocks inside your WordPress/WooCommerce website.
Since we will be dealing with core WordPress files, you must make a full backup of your site in case anything goes wrong. Next, to add the code, you must create a WordPress child theme or use a site-specific plugin like Code Snippets.
In our case, we will use the Code Snippets plugin to add all the external codes.
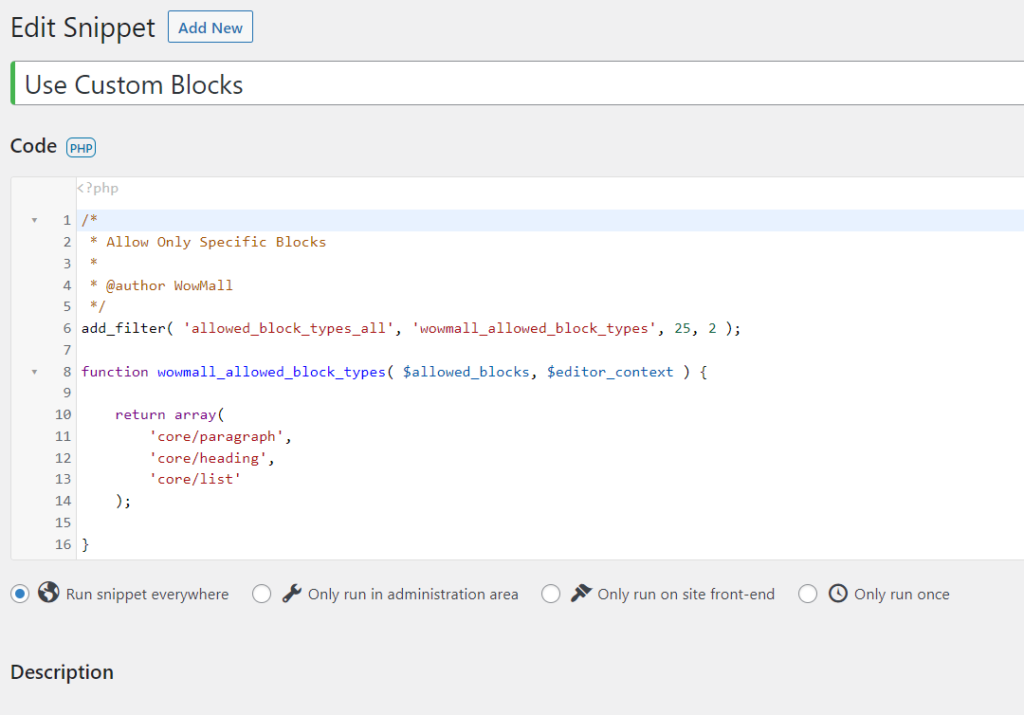
The snippet you need to use is:
add_filter( 'allowed_block_types_all', 'wowmall_allowed_block_types', 25, 2 );

function wowmall_allowed_block_types( $allowed_blocks, $editor_context ) {

	return array(
		'core/paragraph',
		'core/heading',
		'core/list'
	);

}
If you take a closer look at the code, you can see that we have created a WordPress function called wowmall_allowed_block_types and listed three of the useful blocks.
The blocks we listed are:
- Paragraph
- Heading
- List
From the WordPress developer article, you can get the names of the blocks and tweak the code according to your preferences. Once you have updated the code, paste it into the Code Snippets plugin and save the snippet.
Now, open up the Gutenberg editor. You will see that the editor will display only the blocks allowed in the code.
In our case, the editor is showing
- Paragraph
- Heading
- List
as expected. This method is helpful if you only need specific blocks inside your WordPress website.
3.2) Adding Blocks to Pages
Above, we have shown you how to use the code to add a bunch of codes to your Gutenberg editor. The main drawback of the code is the codes will be available sitewide. So, for example, the above code won’t be helpful if you need to add a dedicated block just for use on your pages.
This section will show you how to add dedicated blocks only visible to pages.
If you have added the previous code to the snippets plugin, you need to tweak it slightly.
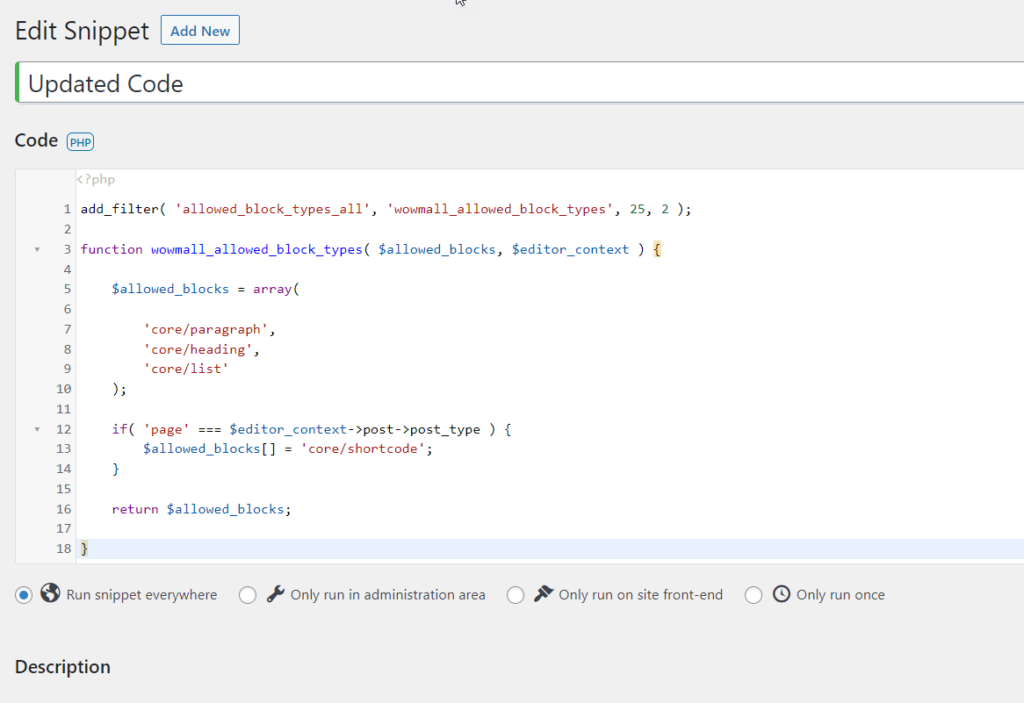
The updated code will be:
add_filter( 'allowed_block_types_all', 'wowmall_allowed_block_types', 25, 2 );

function wowmall_allowed_block_types( $allowed_blocks, $editor_context ) {

	$allowed_blocks = array(

		'core/paragraph',
		'core/heading',
		'core/list'
	);

	if( 'page' === $editor_context->post->post_type ) {
		$allowed_blocks[] = 'core/shortcode';
	}

	return $allowed_blocks;

}
As we mentioned, you can tweak the code according to your preferences. For example, this code will add a paragraph, heading, and list blocks sitewide. On top of that, if you edit any pages, the Gutenberg editor will show you a shortcode block.
To add the code snippet to your site, create a new snippet or update the existing one inside the Code Snippets plugin.
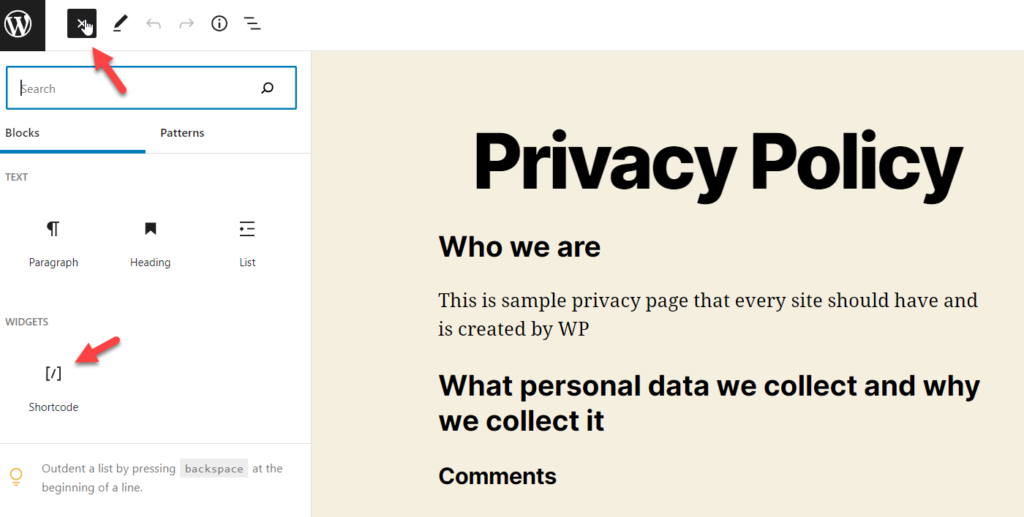
After updating the code, the post editor won’t get any new blocks. But if you check the page editor, you will see the new shortcode block.
That’s it! This way, you can use code snippets to hide unwanted Gutenberg blocks.
Conclusion
If you are working with multiple content writers, you might want to hide the unwanted blocks you do not need. This will help you and the authors seamlessly handle the website/content writing process.
As you can see in this tutorial, three methods are mainly available to hide Gutenberg blocks in WordPress. The ways are:
- Via Gutenberg editor
- Using a plugin
- Via coding
The first method will be perfect if you look for the most straightforward way that doesn’t require additional tools or codes. This way, you can disable all the blocks you do not need in the editor.
If you think you need extra customization options and features, the Block Visibility plugin is an excellent tool. The plugin has many features you will like and is easy to configure.
Lastly, the coding method would be helpful for advanced users.
Now, you can choose a method according to your skill set and requirements.
We hope you have found this article helpful and learned how to hide unwanted Gutenberg blocks in WordPress. Please share this article with your friends and fellow bloggers on social media if you do.
If you liked this article, here are a few more guides you would be interested in:
