Do you want to create a custom color palette in Gutenberg? We have got you covered. If you are looking for a step-by-step tutorial, this article will show you everything you need to know about Gutenberg color palettes and how you can create some.
However, before we jump into custom color palettes, let’s have a look at the default color palette in Gutenberg.
Default Color Palette in Gutenberg
When you use the Gutenberg editor for content creation, you will notice a lot of valuable tools on the right-hand side of the page. One of the essential tools you can see is the color palette tool.
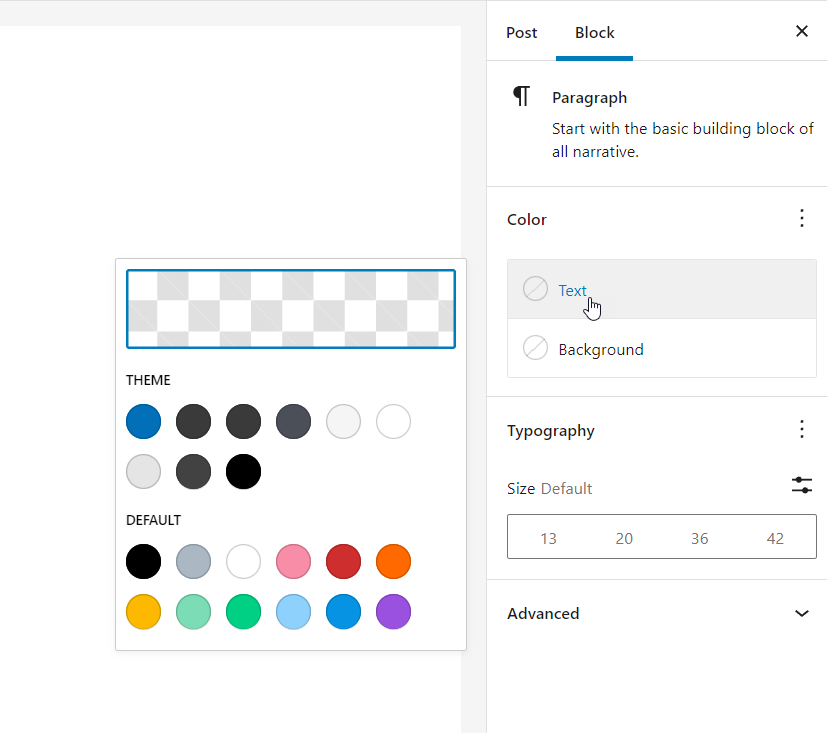
Gutenberg comes with some default coloring options, but with the color picker tool, you can easily choose any color you want. The default color options we have there are:
- Black
- White
- Pale Pink
- vivid Red
- Pale Cyan Blue
- Vivid Cyan Blue
and so on.
Additionally, you will see some color options added by your WordPress theme.
Through the color palette option, you can easily modify the color settings of your
- Text
- Text background
- Link
You can enable/disable the above elements from the color settings option.
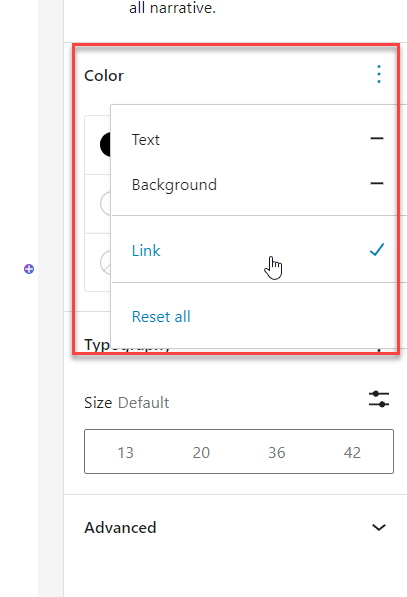
When you select a text color, the chosen color from the palette will automatically be applied to all the text on the page.
Similarly, you can also change the block’s background through the color settings section.
This comes in very handy in multiple situations. For example, with the help of color palettes, you can customize each Gutenberg block according to your preference without writing a single line of CSS code.
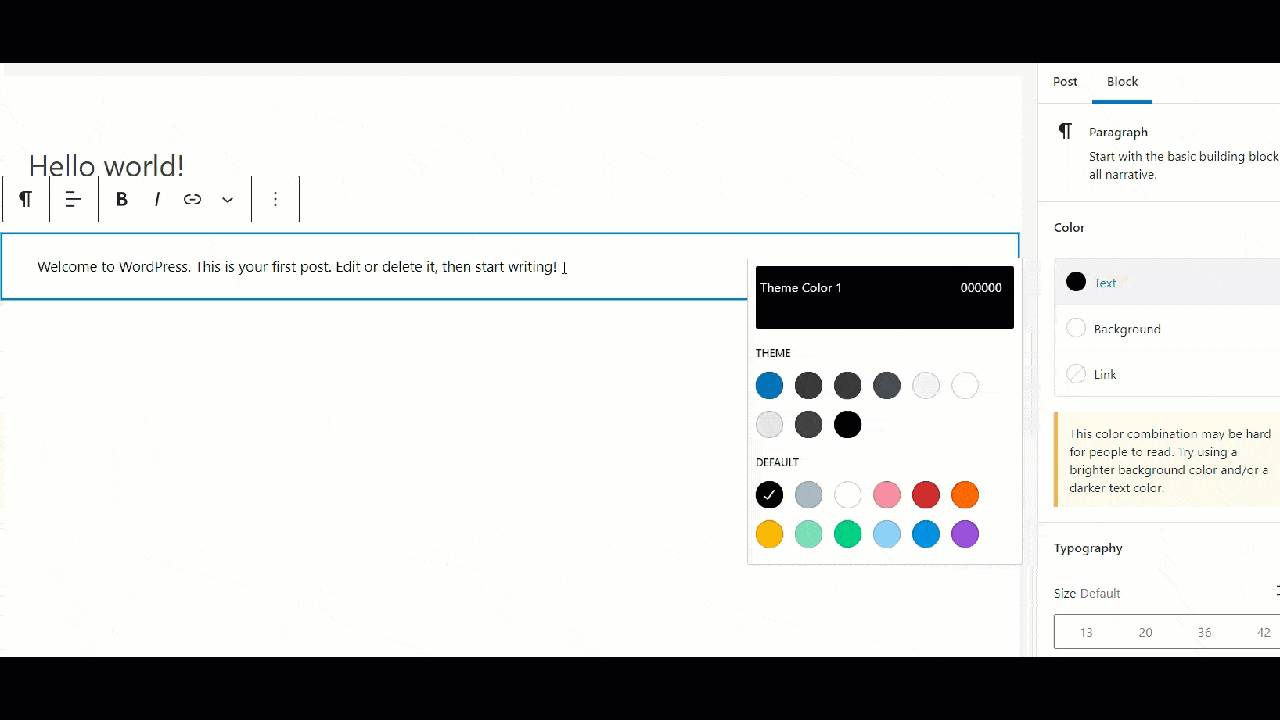
Plus, if you need to pick a custom color, not the pre-defined one, there is a color picker option.
Once you have selected it, you can choose any color from the wizard or enter the hex code of the color you want.

The results will be updated in real-time, and you can see the changes in the editor.
Now, you know about the color palettes. Next, let’s see why you need to create custom color palettes in your Gutenberg editor.
Why Create Custom Color Palettes in Gutenberg?
If you represent a brand, you probably have some colors as the brand identity. For example, if you check Facebook, their primary brand colors are blue (#4267B2), grey (#898F9C), and black (#000000).
They might use these colors wherever possible to represent the brand uniquely. The main advantage of this process is that more people will become used to the colors and understand the brand better.
So, if your blog represents any brand or something that adds value, you should create some brand colors. On top of that, you can also add these colors to your links, header, footer, or even the newsletter.
All in all, creating custom color platelets in Gutenberg will add value to your WordPress website. When you write a blog post, page, or custom post type, you can easily pick your brand color from the color palette on the right sidebar of the editor.
Once you add colors to the palette in Gutenberg, you do not need to add extra CSS or link color to the post. Everything can be done through the Gutenberg editor, which will make your writing life easier and more convenient.
So, let’s see how to create a custom color palette in Gutenberg.
How to Create custom color pallet in Gutenberg
Above, we have described why you need to create custom color palettes in Gutenberg. This section will teach you how to develop and tweak the existing features for better usability.
Before starting, make sure you have a child theme enabled or the Code Snippets plugin installed. We will be editing the theme’s functions.php file throughout the tutorial. So, instead of editing the parent theme files, you can edit the child theme’s functions.php file or add the codes to a site-specific plugin like Code Snippets.
Secondly, please create a full backup of your site before making any changes to the functions.php file so that if anything goes wrong, you can always restore it to a previous point.
With that said, let’s first see what the code for the default color palette looks like. Afterward, we will see how we can edit this code to add custom colors to the palette in Gutenberg.
How the code for the default color palette looks like
The default color palette code will look like this:
 add_theme_support(
      'editor-color-palette',
      array(
        array(
          'name'  => esc_html__( 'Black', 'twentytwentyone' ),
          'slug'  => 'black',
          'color' => $black,
        ),
        array(
          'name'  => esc_html__( 'Dark gray', 'twentytwentyone' ),
          'slug'  => 'dark-gray',
          'color' => $dark_gray,
        ),
        array(
          'name'  => esc_html__( 'Gray', 'twentytwentyone' ),
          'slug'  => 'gray',
          'color' => $gray,
        ),
If you take a closer look at the code, you can see
- Name
- Slug
- Color
Inside it.
These values are essential when you add a new color palette to the website. For example, some WordPress themes will add a value like $black or $green in the color field.
They are basically adding the actual color code through CSS.
Here is an example:
  // Editor color palette.
    $black     = '#000000';
    $dark_gray = '#28303D';
    $gray      = '#39414D';
    $green     = '#D1E4DD';
    $blue      = '#D1DFE4';
We will follow the same method to add new colors to the palette.
Add a new color to the palette
You can add a new color palette to your theme with some custom code.
By default, your WordPress theme and core come with pre-defined color pallets. But according to your brand colors, you can add new colors to the group.
This section will show you how to add a custom color palette in Gutenberg.
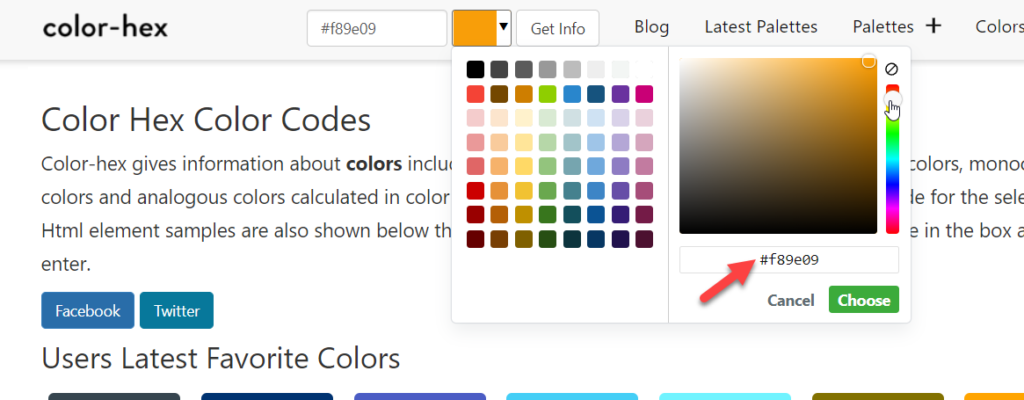
The very first thing you need to do is find the HEX values of the colors you want. To accomplish this task, you can use the Color Hex website.
Once you have found it, you can add the values to the code. The code we are going to use is:
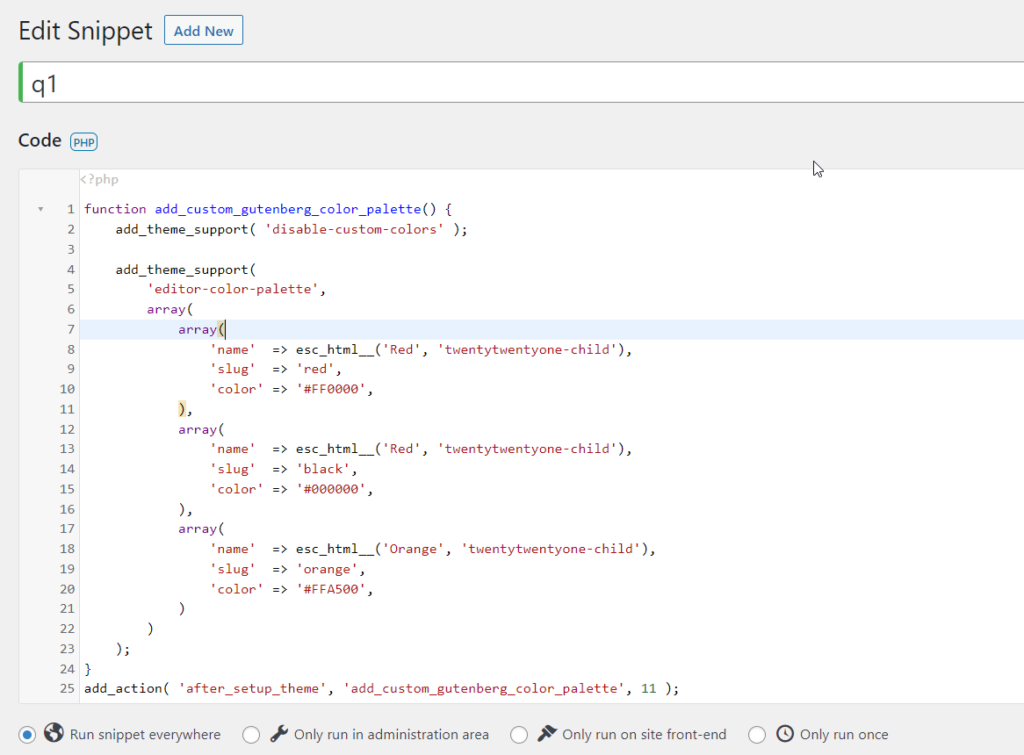
function add_custom_gutenberg_color_palette() {
    add_theme_support( 'disable-custom-colors' );

    add_theme_support(
        'editor-color-palette',
        array(
            array(
                'name'  => esc_html__('Red', 'yourthemename'),
                'slug'  => 'red',
                'color' => '#FF0000',
            ),
			array(
                'name'  => esc_html__('Red', 'yourthemename'),
                'slug'  => 'black',
                'color' => '#000000',
            ),
            array(
                'name'  => esc_html__('Orange', 'yourthemename'),
                'slug'  => 'orange',
                'color' => '#FFA500',
            )
        )
    );
}
add_action( 'after_setup_theme', 'add_custom_gutenberg_color_palette', 11 );
Remember to replace the yourthemename text with the actual name(text domain) of your theme.
Once you have replaced the HEX code and the name of your theme, you can add the snippet to the Code Snippets plugin and Activate the snippet.
Now, you will see the new palette in the Gutenberg editor after activating the code.

This way, you can add a new color to the palette. The palette will work fine, and you can use it in any Gutenberg block.
Update the Stylesheet to use the new color
Sometimes, you must update the style.css file with all the necessary code to comply with the new palette. Once you have updated the stylesheet, you will be able to add the CSS class to any HTML tag. To do that, the CSS code we need to use is:
.has-red-color {
  color:#FF0000;
}
.has-red-background-color {
    background-color:#FF0000;
}
.has-black-color {
  color:#000000;
}
.has-black-background-color {
    background-color:#000000;
}
.has-orange-color {
  color:#FFA500;
}
.has-orange-background-color {
    background-color:#FFA500;
}
You can add this code to the Theme Customizer > Additional CSS section, and you are good to go.

You can tweak the CSS code according to your preferred colors.
Remove the custom color picker
The next thing you need to do is remove the color picker from the Gutenberg editor. If the color picker is present and you work with multiple authors, the authors can easily pick any color they like without telling you. And this can cause issues with the branding.
The best and easy way to stick with brand colors throughout the website is by removing the color picker tool and forcing authors to use the available palette.
This section will show you how to remove the custom color picker from Gutenberg.
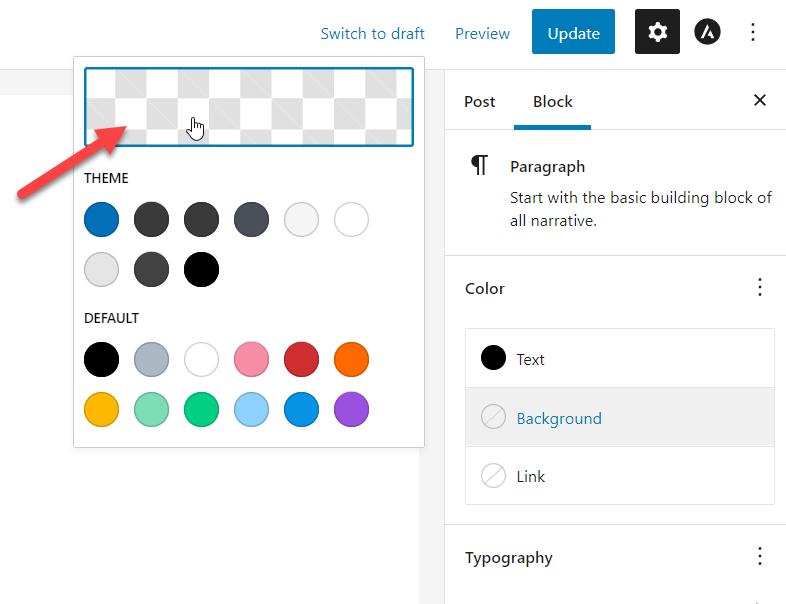
As you can see in the image, the color picker is enabled by default.
There is no option to turn it off through the admin area, so we need to add a simple snippet to the theme’s functions.php file or the Code Snippets plugin.
Copy the snippet from below
add_theme_support( 'disable-custom-colors' );And paste it inside the Code Snippets plugin.
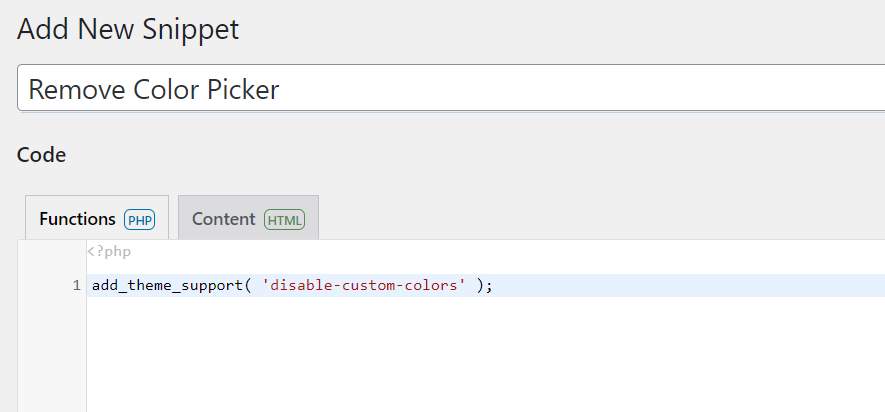
Once you are done with it, save the snippet and activate it. After this, you can go and check the Gutenberg editor.
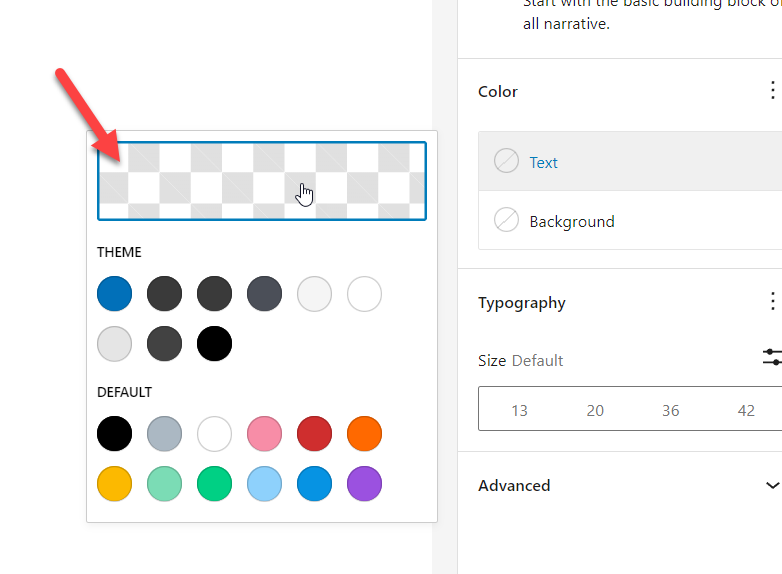
As you can see, the color picker tool is completely removed from the editor. That’s how you can easily remove the custom color picker tool from Gutenberg.
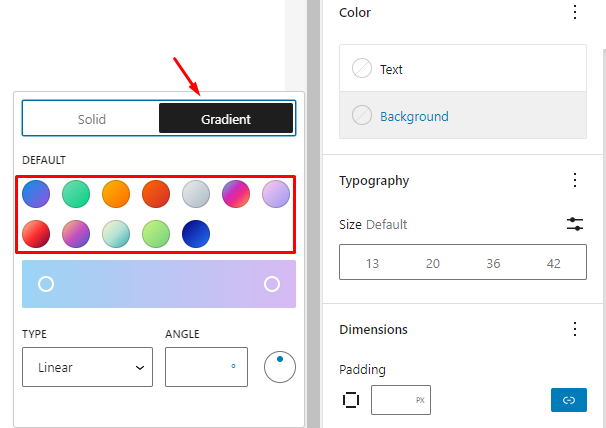
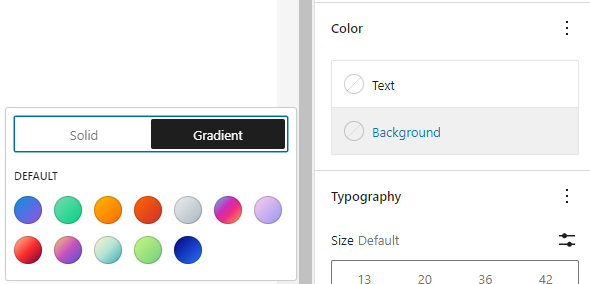
Add Gradient color to the palette
Besides a solid color, the WordPress Block Editor(Gutenberg) allows you to add gradients to the background as well. Gradients are very common in modern sites to enhance the visual appeal of your site.
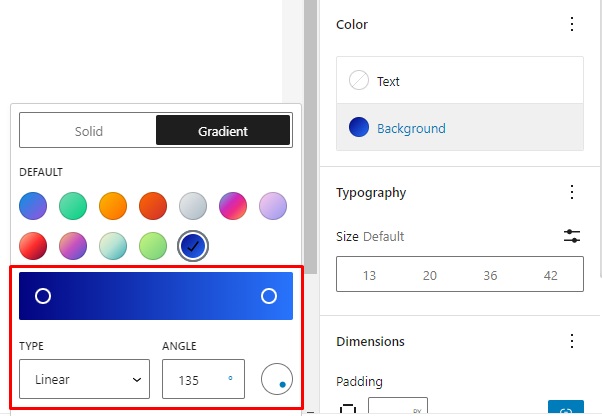
The Gradient tab is available just next to the Solid color option in Gutenberg. Just like with solid colors, Gutenberg comes with a default set of gradients.
However, we can easily add custom gradient colors with some custom code, just like we did with the solid colors. This section will show you how it is done.
Before we start, we need a few things to complete the code.
- Name
- Gradient
- Slug
A sample code will look like this:
array(
            'name'     => __( 'Color 1 to Color 2', 'yourthemename' ),
            'gradient' => 'linear-gradient(135deg,rgba(33,147,176,1) 0%,rgb(138,163,70,1) 100%)',
            'slug'     => 'color-1-to-color-2'
        ),
Do not use the code we mentioned above. It is just an example.
You can tweak the above code according to your preferences and add multiple gradient options. In our case, the final code will look like this:
add_theme_support(
    'editor-gradient-presets',
    array(
        array(
            'name'     => __( 'Dark Blue to green', 'yourthemename' ),
            'gradient' => 'linear-gradient(135deg,rgba(33,147,176,1) 0%,rgb(138,163,70,1) 100%)',
            'slug'     => 'dark-blue-to-green'
        ),
		array(
            'name'     => __( 'Orange to green', 'yourthemename' ),
            'gradient' => 'linear-gradient(135deg,rgba(255,153,0,1) 0%,rgba(138,163,70,1) 100%)',
            'slug'     =>  'orange-to-green',
        ),

    )
);
Copy the above mentioned code and paste it inside the Code Snippet plugin.
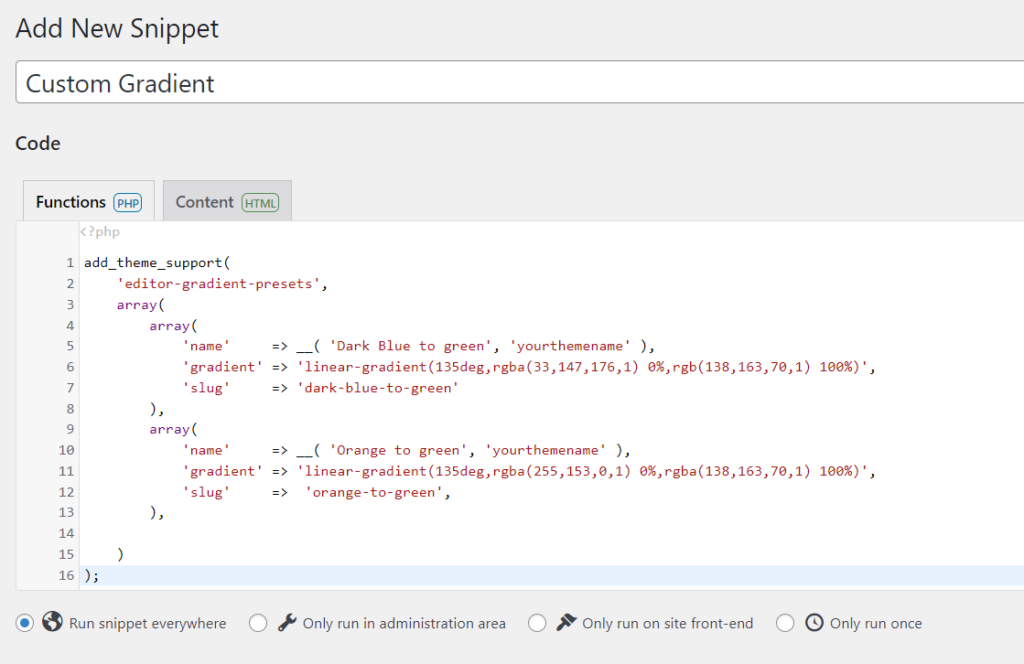
Make sure to replace the yourthemename with your theme’s actual name(text domain).
Right now, you can use the gradient option only for specific blocks. For this tutorial, we will be applying the gradient option to a button block.
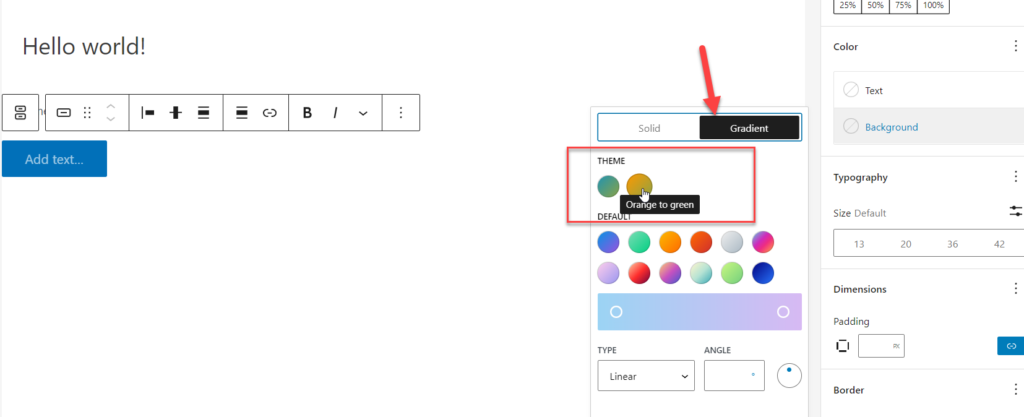
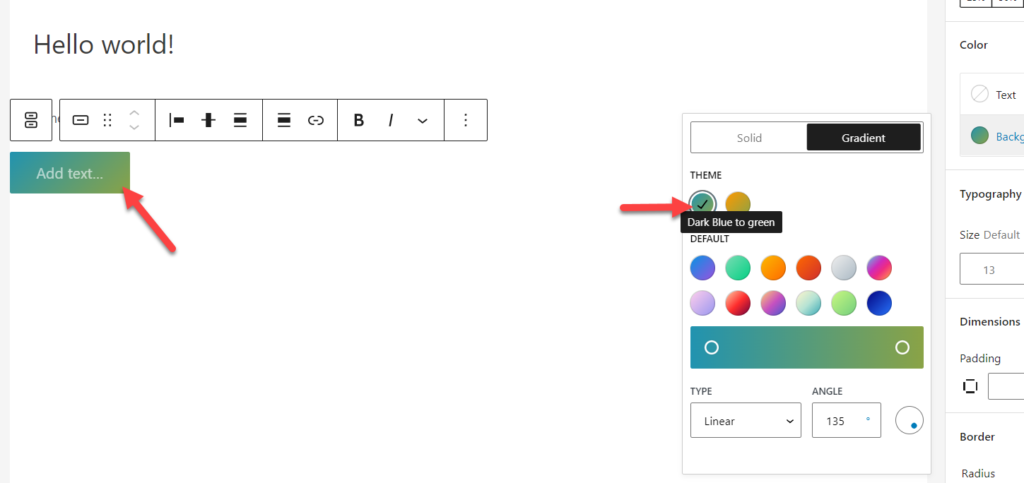
So, in a new line, add a button block, and you will see the gradient options inside the color picker. As you can see, both of the gradients that we just created are visible in the gradients tab.
You can select any gradient you have created. All you need to do next is, select an option and save (or update) the article.
That’s it. Similarly, you can add as many custom gradients as you like. Whenever you need to add more colors to the gradient tab, you can easily tweak the code and get your desired gradients.
Update the Stylesheet to use A new gradient
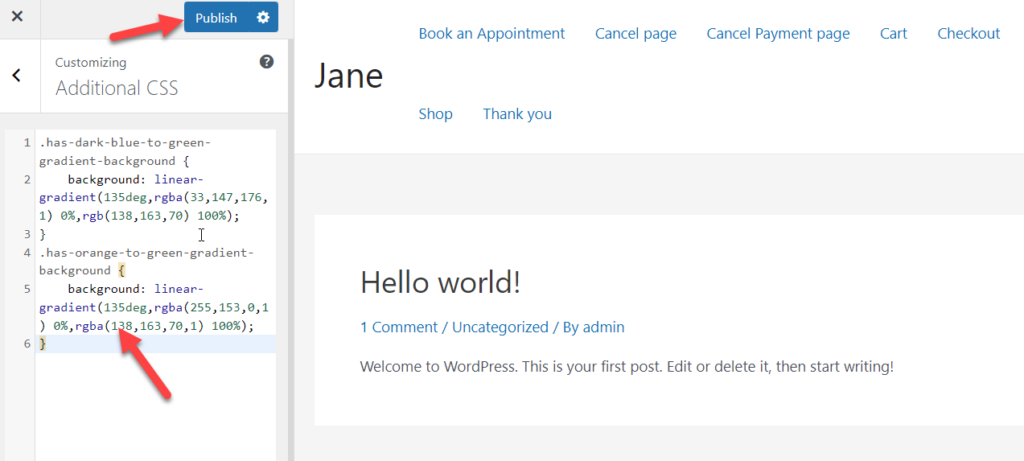
Above, we have shown you how to create a custom gradient color. This section will show you how to add it to your Stylesheet so you can properly add the CSS class to any HTML tag. According to our gradient colors, the CSS code will look like this:
.has-dark-blue-to-green-gradient-background {
    background: linear-gradient(135deg,rgba(33,147,176,1) 0%,rgb(138,163,70) 100%);
}
.has-orange-to-green-gradient-background {
    background: linear-gradient(135deg,rgba(255,153,0,1) 0%,rgba(138,163,70,1) 100%);
}
Let’s break down the above snippet for better understanding.
- First, you need to mention the CSS class, as shown below. Remember to replace the word slug with the actual slug of your gradient.
.has-slug-gradient-background- Next, you can update the values according to your gradient color code. E.g.,
background: linear-gradient(135deg,rgba(33,147,176,1) 0%,rgb(138,163,70) 100%);Once you have your CSS snippet ready, you need to add it to your theme. To do that, go to Theme Customizer > Additional CSS and paste your CSS code here. Hit Publish to save the changes.
That’s all. Now you can use the gradient CSS class inside any HTML tag on your website.
Finally, in the next section, let’s see how to remove the custom gradient picker tool from the Gutenberg editor.
Remove the custom gradient picker
Just like a custom color picker tool, Gutenberg also provides a custom gradient tool. Using this tool, you can create any custom gradient you may like.
Previously, we saw how to remove the custom color picker and why it may be necessary. Similarly, removing the custom gradient picker is necessary so that no user can start creating their own gradients. Everyone should only be allowed to pick from the specified brand gradients.
So, to remove the custom gradient picker, you will need to use the following code snippet.
add_theme_support( 'disable-custom-gradients' );Create a new snippet inside the Code Snippets plugin and paste the above code snippet there. Once done, activate the snippet for it to take effect.
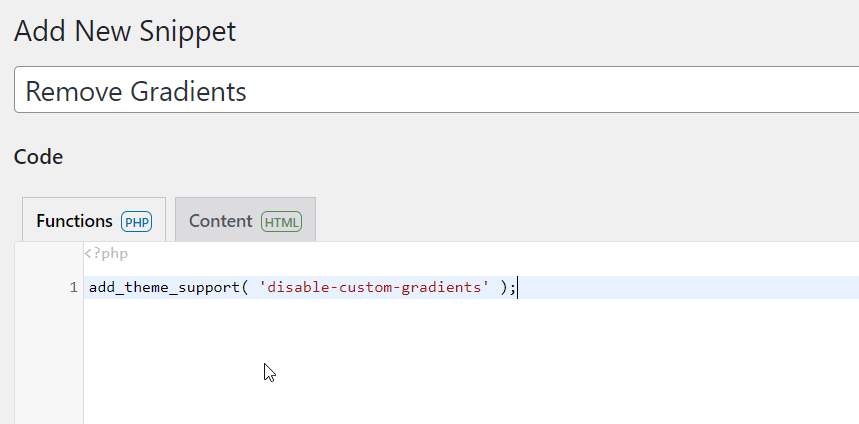
From now on, you will see the custom color picker tool(if you haven’t disabled it earlier). However, the custom gradient picker tool is now removed.
That’s it! That’s how easy it is to remove the custom gradient picker tool from the Gutenberg editor.
Conclusion
All in all, brand colors are one of the crucial things for most businesses and professional blogs. You must choose a brand color (or a few) and stick with it. The best way to tell your website visitors about the brand color is through the header, footer, and newsletter. This creates a strong sense of your brand and familiarity among the users.
So many websites add their brand colors to the color palette and use them in the call-to-action buttons or wherever they can. So, in this article, we saw how, with some simple codes, you can add a custom color palette in Gutenberg, change the gradient colors, add custom colors, remove existing features, etc.
All this can come in handy if you need to take your brand to the next level.
We hope you have found this article helpful and learned how to create a custom color palette in Gutenberg. Have you ever thought of customizing your color palette in Gutenberg? How important do you think it can be for your online presence? Share your thoughts with us in the comments below.
Meanwhile, here are some other related articles you might be interested in:
