Do you want to add CSS to Gutenberg but aren’t sure how to do it correctly? We’ve got you covered! In this beginner-friendly guide, we’ll discuss some of the easiest ways to add CSS Classes to Gutenberg Blocks.
What is Gutenberg Block Editor?
Gutenberg block editor is the new editor for WordPress released during the launch of WordPress 5.0 on November 27, 2018. It is a significant upgrade from the classic WordPress editor as it uses blocks to edit various areas of your website as its name suggests.
With the help of the Gutenberg block editor, you can individually customize each section of the page or post as a separate block. These blocks may include text areas, images, lists, links, widgets, and much more, compared to the limited customization options of the old classic editor.
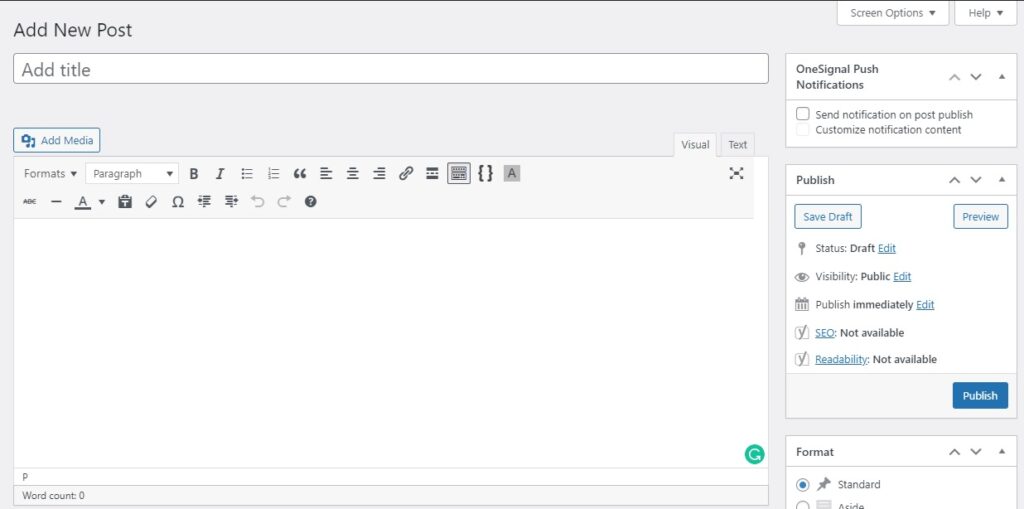
If you look at the classic editor, you can see that you have to customize every aspect of the webpage through the options provided to you at the top.
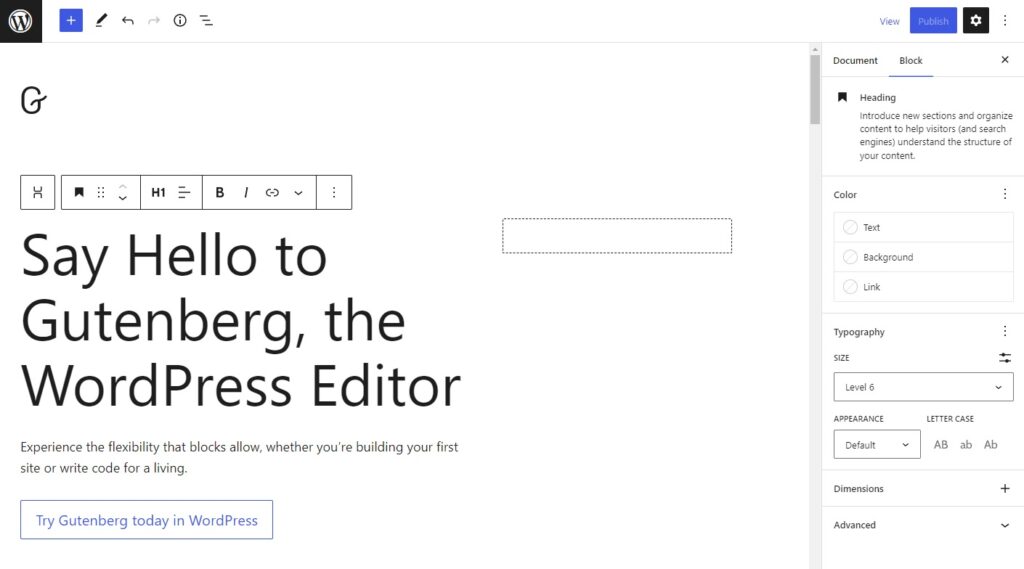
In the Gutenberg block editor, on the other hand, content is distinguished with different types of blocks. All these individual blocks have their own styling options provided to you on the right sidebar of your screen.
The addition of Gutenberg block editor to WordPress has really revolutionized the way people design their websites. It has certainly made it easier for users to modify their websites in less time. This is also due to some of the easy-to-use default styling options for Gutenberg blocks.
Default Styling options for Gutenberg Blocks
The Gutenberg blocks have some awesome customization options that are included by default. But, they can vary depending on what type of content block you add. Here are a few of them.
- Heading
The options under the heading block include color options for text, background, link, and typography options for size, appearance, and letter cases.
- Paragraph
Similar to the heading block, the paragraph block also includes color options for text, background, link, and typography options for text size.
- Image
The Image block provides you with the default options of image styles, dimensions, border, and radius.
- Cover
The cover block provides many styling options and includes media settings for fixed and repeated backgrounds, color overlay and opacity, typography, and dimensions.
- Column
This block allows you to modify the color, dimension, and typography as well as select the layout and width of the columns.
- Button
The button block has the option to change the styles of the button on whether you want just the outline or to fill it. It also has color, typography, border, and padding options.
- Groups
The groups block is one of the most useful blocks of the Gutenberg editor. You can group multiple types of blocks within a single block. You can even group them as a row or a stack along with color, typography, border, and padding options.
These are some of the most common blocks that you can use to design your website. You can even add more built-in options to these blocks, but these are the default styling options provided to you when you add them as a new block.
To customize your site, you can also add additional CSS classes to all the Gutenberg blocks. But before we see how to add them, let’s better understand why you would do that.
Why add CSS Classes to Gutenberg Blocks?
There may be many reasons why you may need to add CSS classes to Gutenberg blocks. Even though WordPress provides you with a lot of default styling options, you may need something else.
Using the default styling options from the Gutenberg blocks may be very time-consuming if you have to make the same changes for multiple web pages. For example, let’s say you want to add a specific type of font family in certain areas of multiple pages with a particular background color.
You can easily do this with the default styling options of the Gutenberg editor by opening the web pages. However, you can save a lot of time by creating a custom CSS stylesheet and adding the CSS classes to these pages. This is because you won’t need to open every page and adjust every styling option from the Gutenberg editor.
Additionally, the default styling options may not be enough for you if you want to make a few other changes to your website. For example, customizations and animations such as moving elements and adding text scroll bars aren’t available with the default options. So you will have to add CSS classes to the Gutenberg blocks if you want some creative and unique web pages on your website.
How to Add CSS Classes to Gutenberg Blocks
You can add CSS classes to Gutenberg blocks in many ways. Here are the 3 most popular ones:
- Add CSS classes to the Gutenberg editor
- Add CSS classes via Theme Customizer
- Add CSS classes using a plugin
We’ll go through each of these methods in detail.
Note: Customizing and adding CSS code to your website requires a strong knowledge of how CSS stylesheets and classes work.
Before you proceed, make sure you have an adequate idea of CSS stylesheets or ask for help from someone who knows about CSS stylesheets.
1. Add CSS Classes to Gutenberg Editor
You can easily add CSS classes to the Gutenberg editor in WordPress. For that, you’ll need to add a custom CSS style to your child theme’s stylesheet. Then, you can add the CSS classes to any specific block of the page or post on your website that you want.
They can be added to your default theme stylesheet directly too, but any major changes to your theme files may be risky as the changes may not be saved when you update the theme. That’s why we recommend using a child theme.
1.1. Add a Custom CSS Style to Child Theme’s Stylesheet
To add a custom CSS style on your child theme’s stylesheet, go to Appearance > Theme File Editor and select the child theme on the right side of your screen. Then, open the Stylesheet (style.css) page just below it.
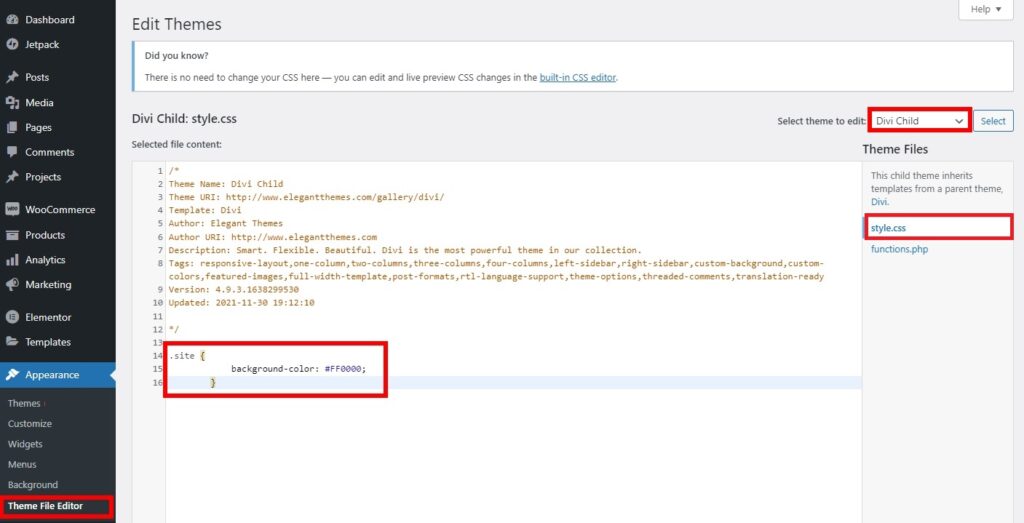
You can add your own CSS style here. In the following demonstration, we have added a very simple custom CSS style to change the background color of a specific block.
.site {

            background-color: #FFFF00;

        }
Here, add your custom CSS style and Update it when you’re done.
Now, you can add the CSS class to your Gutenberg editor.
Here are a few examples of things you can add to your website with a bit of CSS:
Add a text scroll Bar:
ul {

    height:370px;

    overflow-y:scroll;

}
Move elements:
#wmwapp{

    bottom:45px;

    left:25px;

    position:relative;

}
Mobile mode:
@media only screen and (max-width:768px){

    div.masthead{

        display:inline-block;

        width:50%;

        margin:auto;

    }

}
1.2. Add CSS Class to Gutenberg Blocks
To add the CSS class to your Gutenberg blocks, open the page or the post where you want to modify it. We will be adding it to a post for this tutorial.
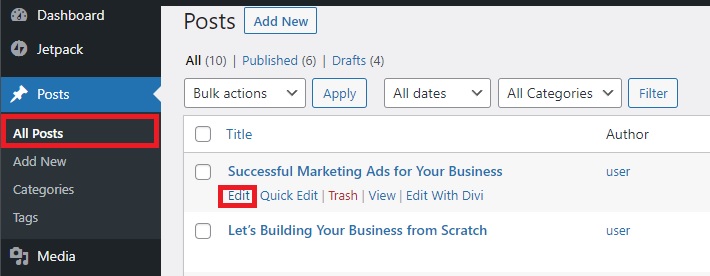
Go to Posts > All Posts in your WordPress dashboard and click Edit next to the post you want to customize. This will open the post editor.
Here, click on the block that you want to customize and scroll down the block options on the right side of your screen to Advanced options.
Here you will see a textbox for Additional CSS class(es). Just add your CSS class to this textbox and Update the post.
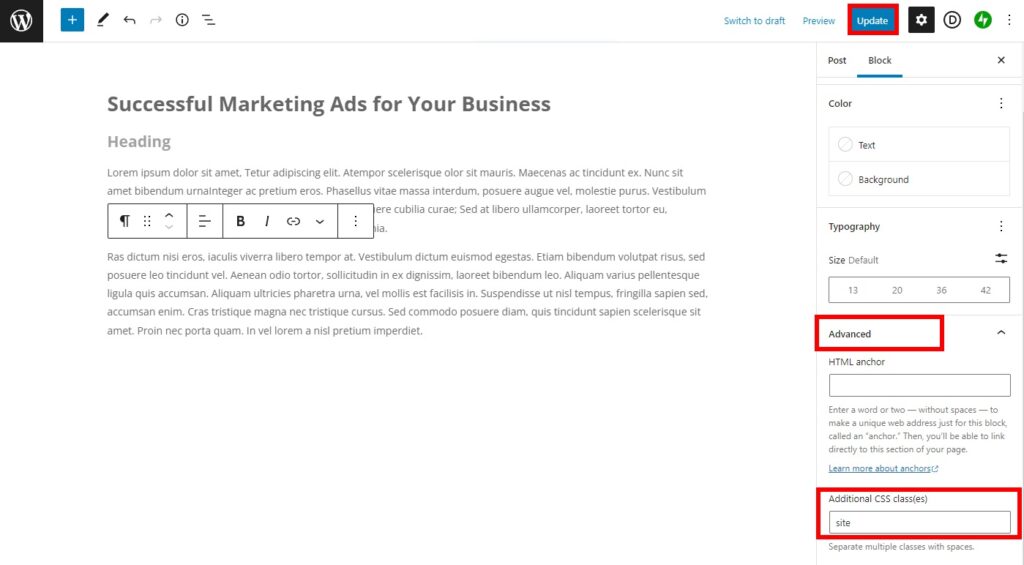
You will be able to see the changes after you preview the post on your website.

2. Add CSS Classes via Theme Customizer
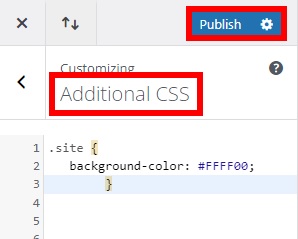
If you don’t want to mess around with the core files of your website, you can use the theme customizer to add CSS classes to the Gutenberg blocks.
All you have to do is go to Appearance > Customize in your WordPress dashboard. Once in the theme customizer, press the Additional CSS customizer menu and you will be redirected to the section where you can add additional CSS styles to your site.
Just add your custom CSS styles here. For this demonstration, we’ve used the CSS style to change the background color of a block.
Once you’re done adding it, remember to press Publish to save your changes.
Again, open the post or page editor of the post or page where you want to add the CSS classes to Gutenberg blocks. Then, click on the block you want to edit and add the CSS class on the right sidebar of the editor under the Additional CSS class(es) option.
Finally, Update the post/page.
When you preview the post or the page, it will be changed according to your CSS style.
That’s it! These are some of the default ways to add custom CSS to Gutenberg blocks.
3. Add CSS Classes using a Plugin
Adding CSS classes to Gutenberg using theme files and the theme customizer is easy, but it may be very time-consuming if you have to make a lot of changes to your website using CSS. In these cases, you can just use a plugin to add CSS classes to Gutenberg blocks.
WordPress plugins help you increase the functionality of your website and there are a number of plugins that help you add custom CSS to your website.
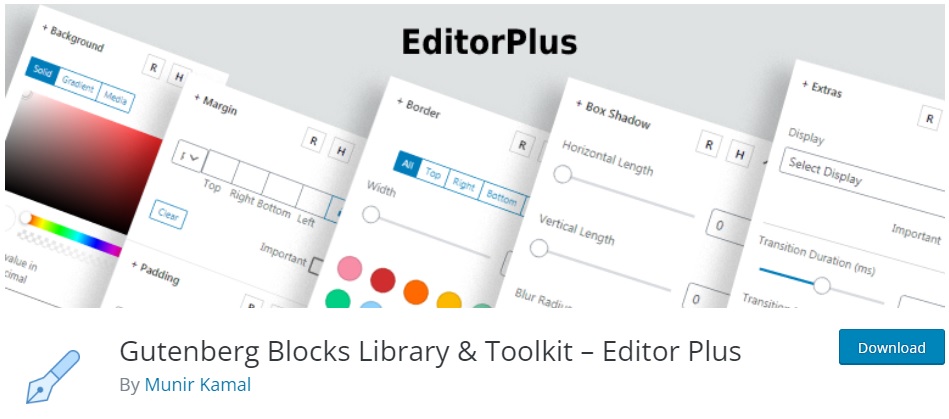
For this demo, we will use the Editor Plus plugin. Apart from enabling you to add CSS without codes, it is also very easy-to-use and includes advanced design options for typography, icons, animations, and many more.
So Let’s go ahead and install and activate the plugin.
3.1. Install and Activate the Plugin
To install the plugin, go to Plugins > Add New in your WordPress dashboard and search for the keywords of the plugin. After you find the plugin in the search results, click on Install Now.
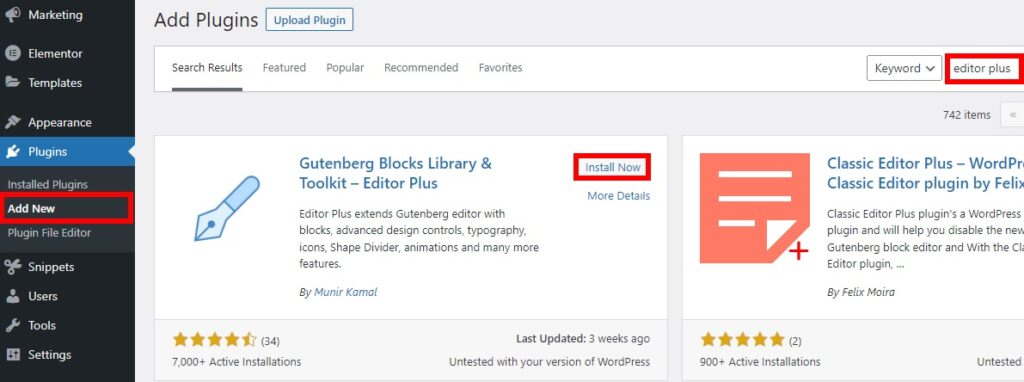
As soon as the installation is completed, Activate the plugin.
If you want, you can even manually upload and install the plugin to your website. Just download the zip file from the plugin page and upload it from the file uploader on your computer by clicking on Upload Plugin.
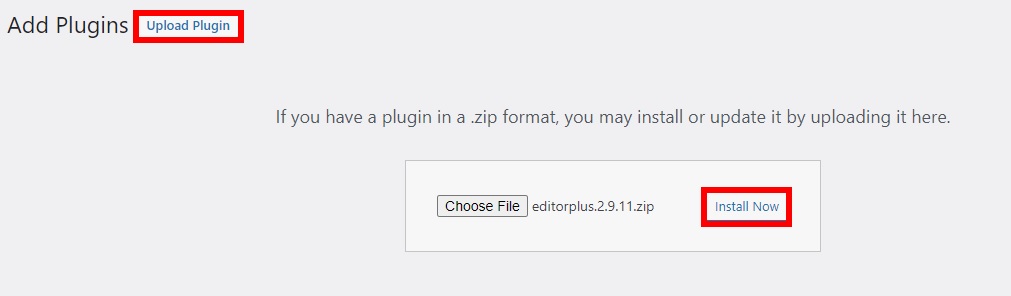
Then, click on Install Now to install the plugin and finally Activate it.
3.2. Add Custom CSS using Plugin Options
To use the plugin options, you have to open the post or page editor where you want to add the CSS classes on your website once again.
So we’ll open the post editor once again from Posts > All Posts.
After you open the post editor, click on the Gutenberg block where you want to add the CSS classes.
You’ll see all the block options that the plugin has provided you with on your right sidebar. Just scroll down to the Custom CSS option and expand it.
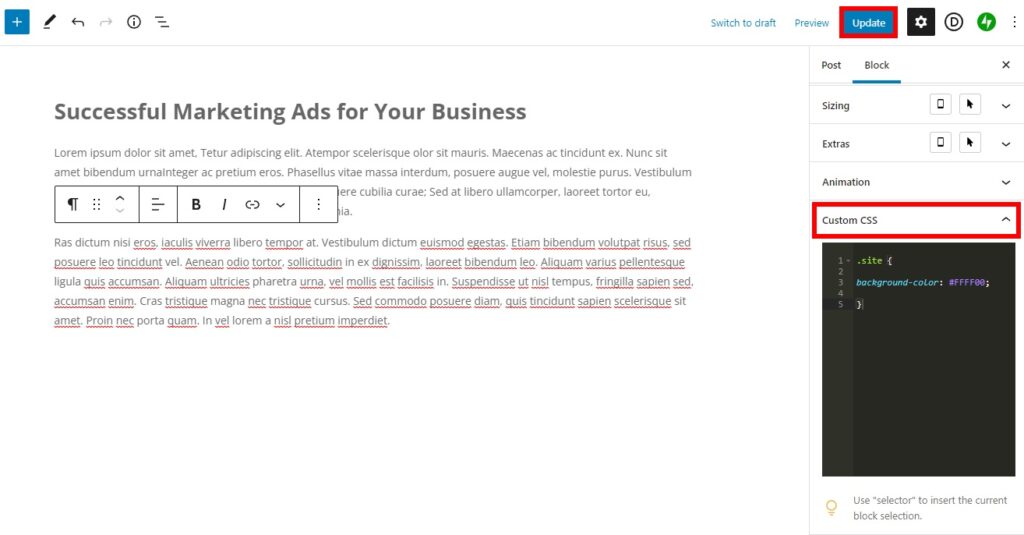
Now, add the CSS codes here to edit the particular block of the post.
After you’ve added it, Update the post.
You can see the changes to the post when you preview it on your website.
Excellent! This is how you can add CSS classes to Gutenberg blocks using a plugin. If you have to use the same CSS codes for multiple areas of your website, you can just open the editor and copy and paste the codes.
Conclusion
These are all the different ways you can add CSS classes to the Gutenberg blocks on your website. They can help you save a lot of time if you have to perform the same styling customizations on multiple pages. Similarly, you can use the CSS classes for the Gutenberg blocks to add unique block customizations for your website apart from the default options.
To summarize, we’ve discussed the following approaches to adding CSS classes to your website:
- Gutenberg editor
- Theme Customizer
- Using a plugin
To add the CSS classes to the Gutenberg editor directly, you need to add the custom CSS codes to your child’s theme files first. If you don’t want to modify the core theme files of your website, you can even use the theme customizer approach.
Alternatively, using a plugin can also be a better option for you if you want to change the styling options of the blocks directly from just the page or post-editors.
We hope that our guide to adding the CSS codes to the block editor was helpful to you. So here are some more of our articles that might be resourceful to you.
